How to Reuse HDPE Plastic Safely: Melt, Mold, and Create?
HDPE (High-Density Polyethylene) is one of the most common and recyclable plastics in the world. It’s used in everyday products like milk jugs, detergent bottles, and plastic containers. Instead of tossing it into the trash, you can reuse and reshape HDPE at home, turning waste into creative, useful items. In this guide, you’ll learn how to melt, mold, and safely create new things from HDPE plastic
🧩 What Is HDPE Plastic?
HDPE stands for High-Density Polyethylene, a durable, lightweight plastic marked with the recycling symbol #2. It’s known for being:
Heat-resistant and impact-tough
Waterproof and chemical-resistant
Fully recyclable and reusable
Because of these properties, HDPE is ideal for DIY recycling and crafting projects
♻️ Why Reuse HDPE?
Reusing HDPE plastic has several environmental and creative benefits:
🌍 Reduces plastic waste in landfills and oceans
💰 Saves money on new materials
🎨 Encourages creativity in DIY and small-scale manufacturing
🔁 Promotes sustainability and circular economy practices
⚠️ Safety First: Before You Start
Working with HDPE requires basic safety precautions to protect yourself from heat and fumes.
✅ Always wear:
Heat-resistant gloves
Safety goggles
Long sleeves
✅ Work in a well-ventilated area (or outdoors) ✅ Avoid overheating HDPE — it melts around 120–180°C (248–356°F). Above this range, it may release fumes.
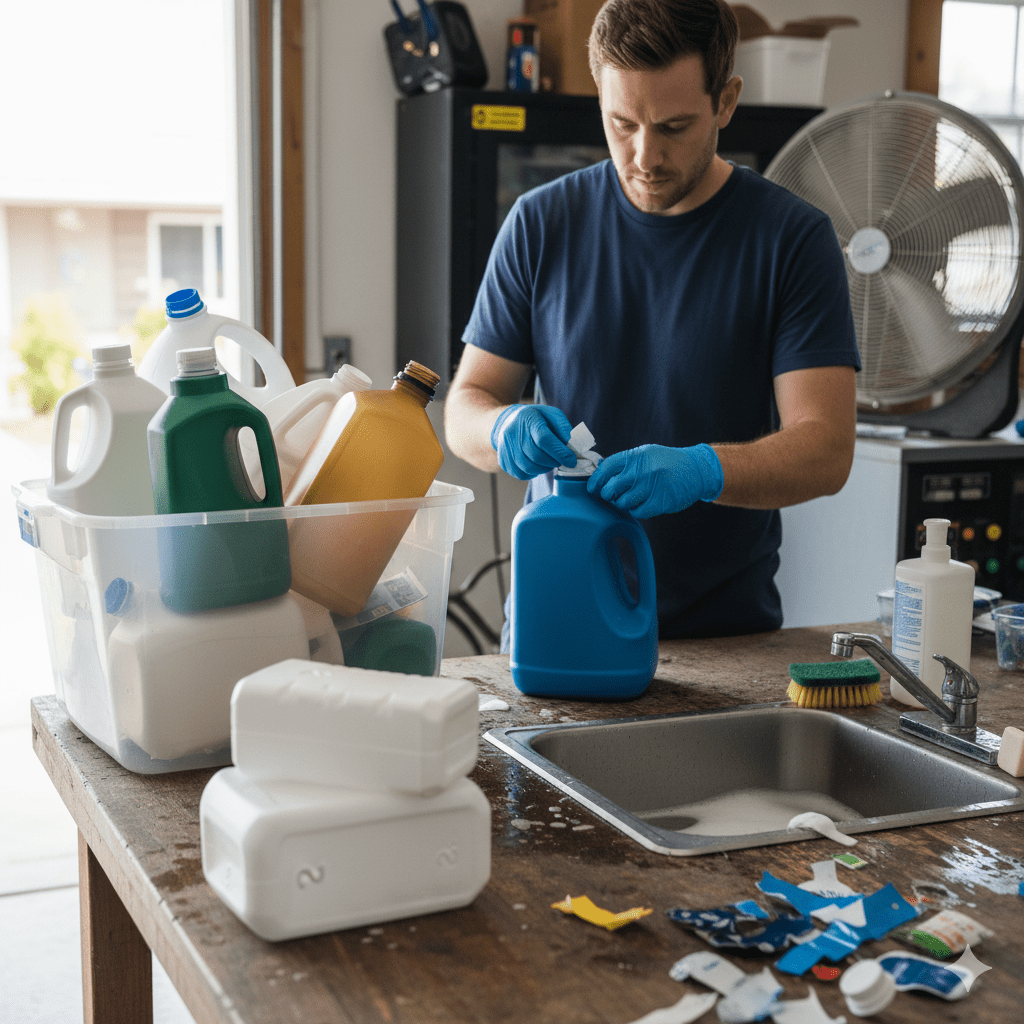
🔥 Step 1: Collect and Clean HDPE Plastic
Start by identifying HDPE items with the #2 recycling code, commonly found on:
Milk jugs
Shampoo bottles
Detergent containers
Bottle caps
Steps:
Wash thoroughly with warm, soapy water.
Remove labels, stickers, and any metal or paper parts.
Dry completely before melting.
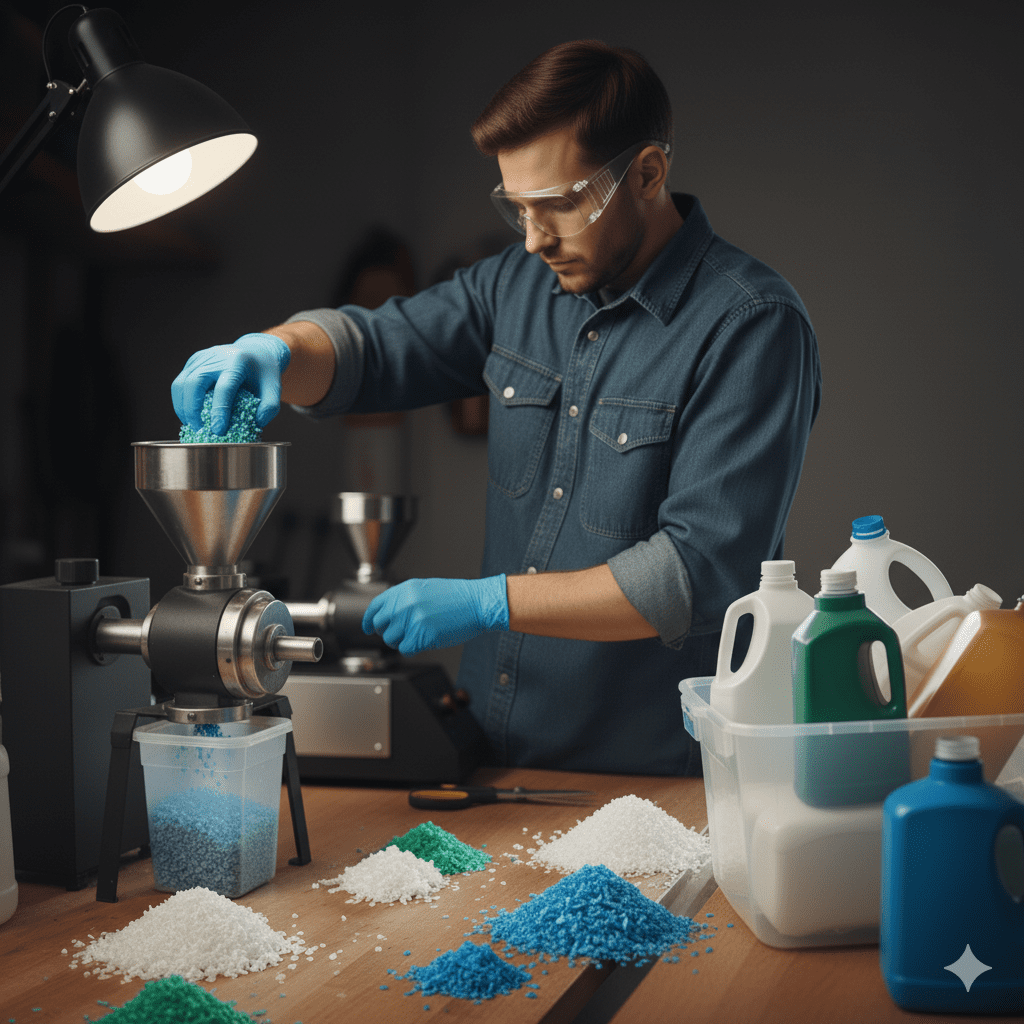
🧱 Step 2: Cut and Prepare for Melting
Cut or shred HDPE into small pieces using scissors or a utility knife. Smaller pieces melt faster and more evenly.
Tip: You can also use a plastic shredder or blender (dedicated only for plastic use).
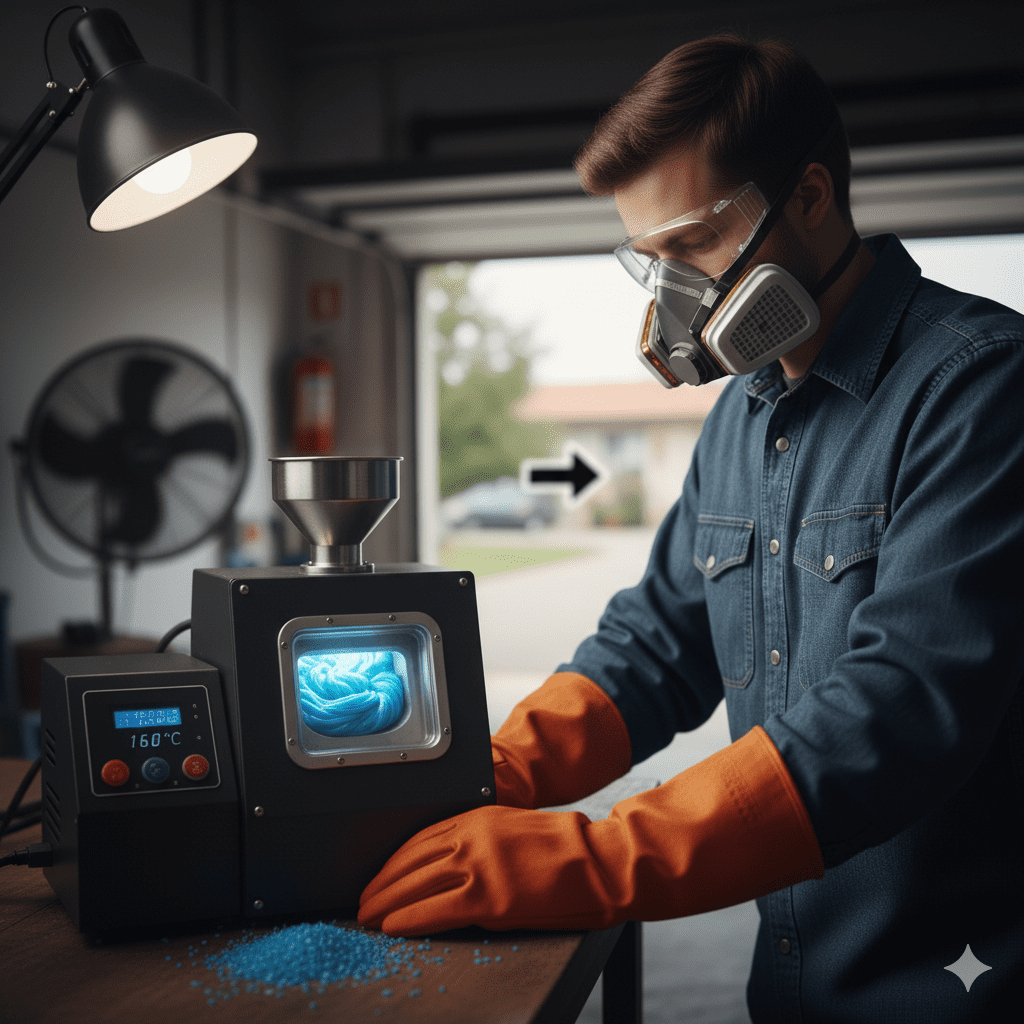
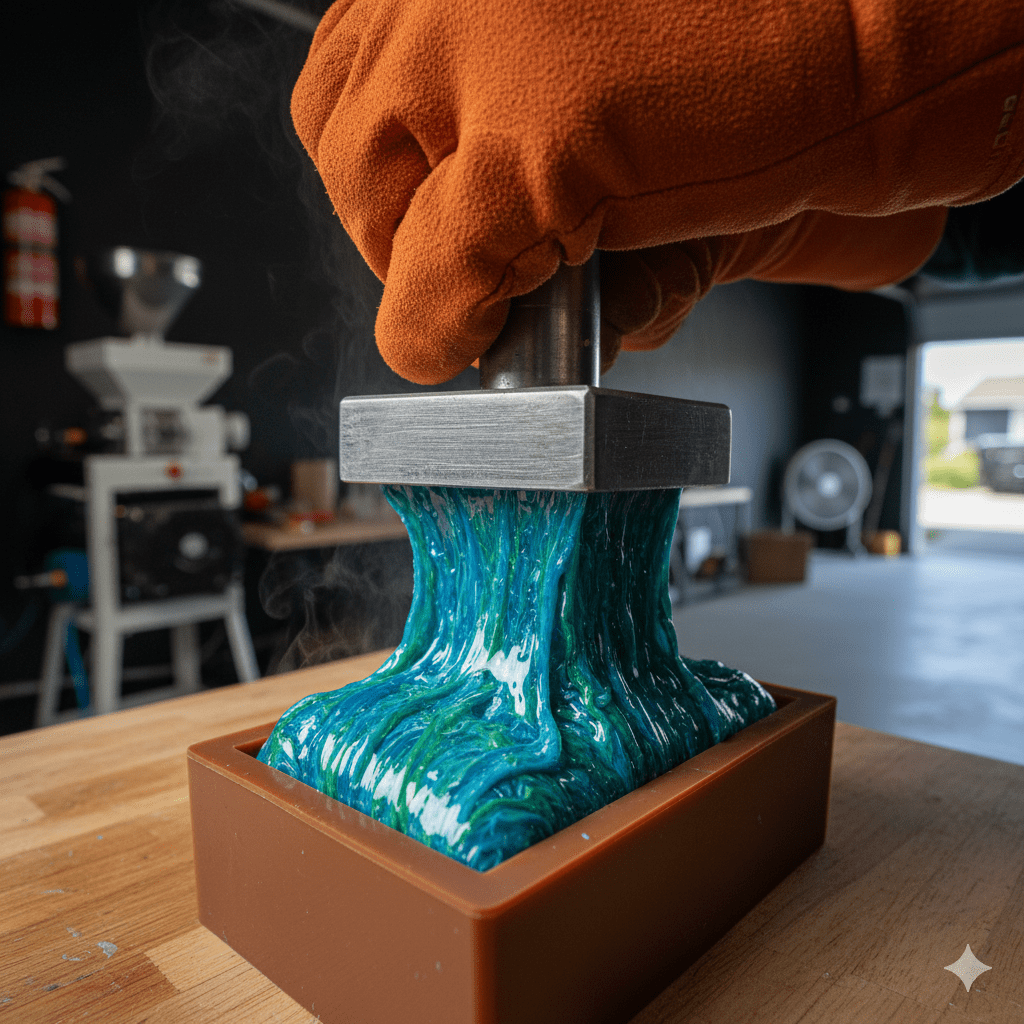
♨️ Step 3: Melt HDPE Plastic Safely
There are a few methods to melt HDPE at home:
Oven Method
Preheat your oven to 170°C (340°F).
Place plastic pieces into a baking mold lined with parchment paper or silicone.
Heat for 10–20 minutes until it softens and fuses together.
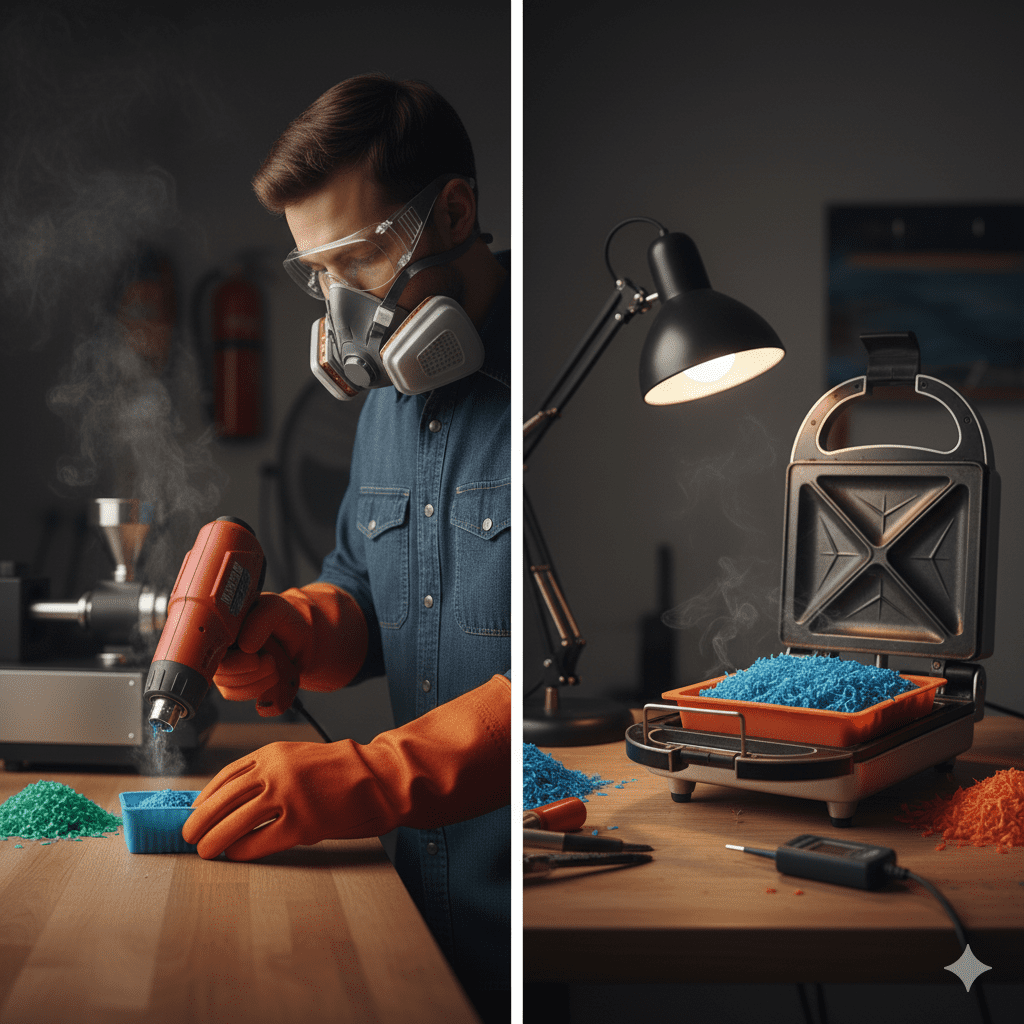
Heat Gun or Sandwich Press
Use a heat gun to melt small amounts gradually.
Or, press layers between baking paper using an old sandwich press.
Never use cooking utensils you plan to use for food later!
🧩 Step 4: Mold and Shape the HDPE
Once melted, you can:
Press it into molds (silicone or metal)
Roll it flat to make sheets
Carve or drill into it after cooling
HDPE cools quickly, becoming solid and durable. You can reheat and reshape it multiple times.
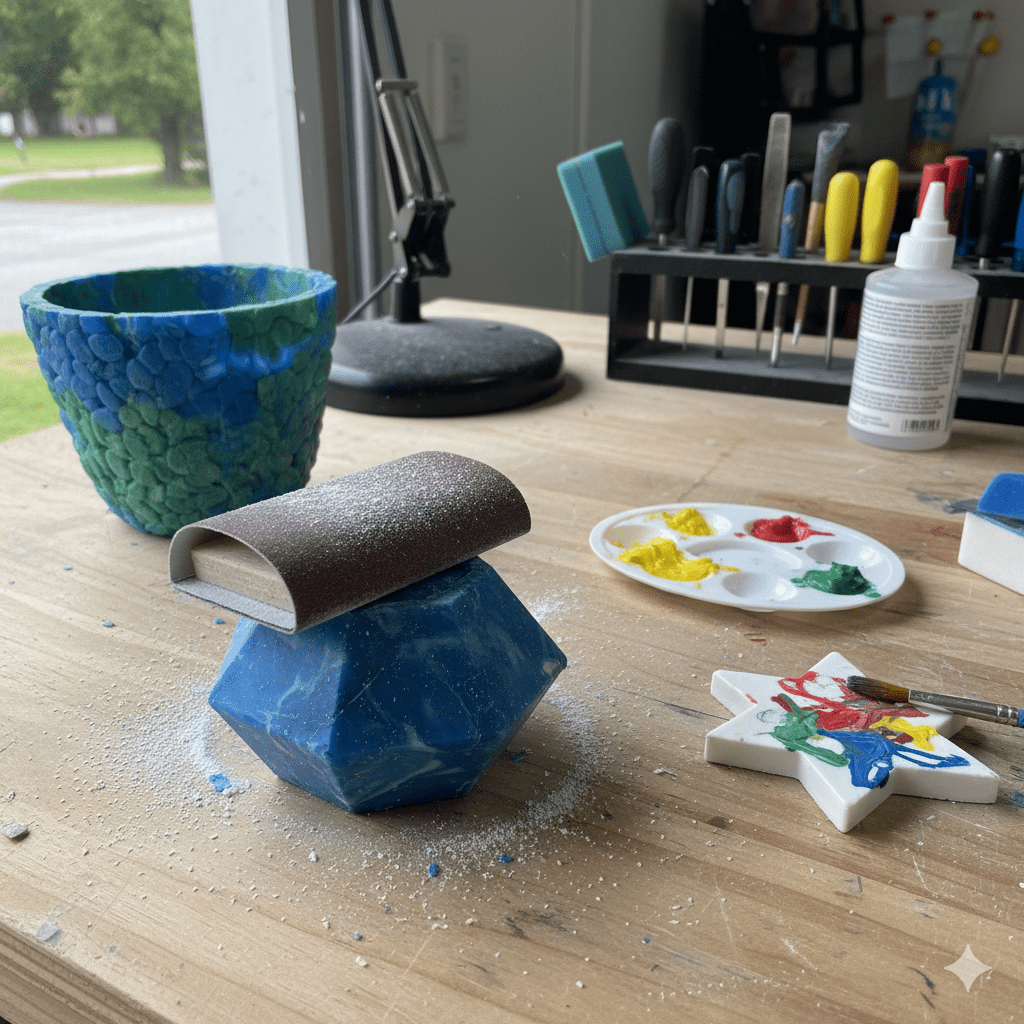
🪚 Step 5: Sand, Paint, or Finish Your Creations
After cooling:
Trim rough edges with a knife or saw
Sand for a smooth finish
Optionally, paint with acrylics or add patterns
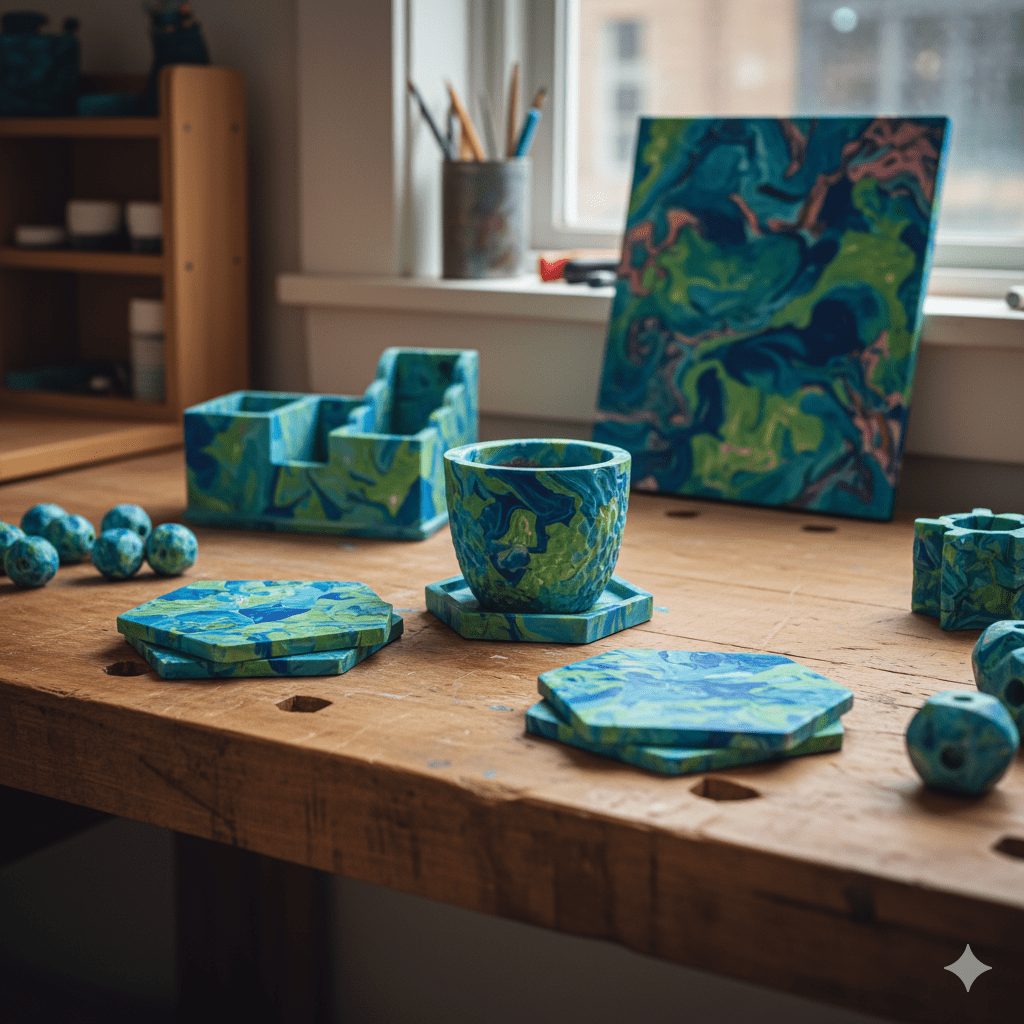
🧠 Creative Ideas: What You Can Make with HDPE
HDPE is surprisingly versatile! Try creating:
🌱 Garden planters
🎨 DIY coasters or keychains
🧩 Plastic bricks or tiles
🔧 Tool handles
🪑 Furniture parts or boards
For more advanced creators, HDPE can even be turned into 3D printing filament or injection molded parts.